How to Measure Hallways for ADA Compliant Handrails?

Time:2026-07-07 Author:Oliver
0%

When considering accessibility, one vital aspect is handrail installation in hallways. Properly measuring hallways ensures features comply with the Americans with Disabilities Act (ADA) standards. This raises an important question: how to measure a hallway for ADA-compliant handrails? Understanding the ADA requirements can streamline this process.

Accurate measurements provide a foundation for safety and usability. Hallways should have enough space for individuals to navigate easily. Consider obstacles that could obstruct access. This goes beyond simple measurements; it requires thoughtful planning. Not every hallway is the same, and unique challenges may arise with existing structures. Are you prepared to address these challenges?

Focusing on compliance is essential. Missteps in measurements can lead to costly adjustments. Knowing the minimum height and grip thickness for handrails is critical. Inadequate installation may not support those who need it most. Thus, thorough preparation is necessary to ensure effective and accessible hallways.
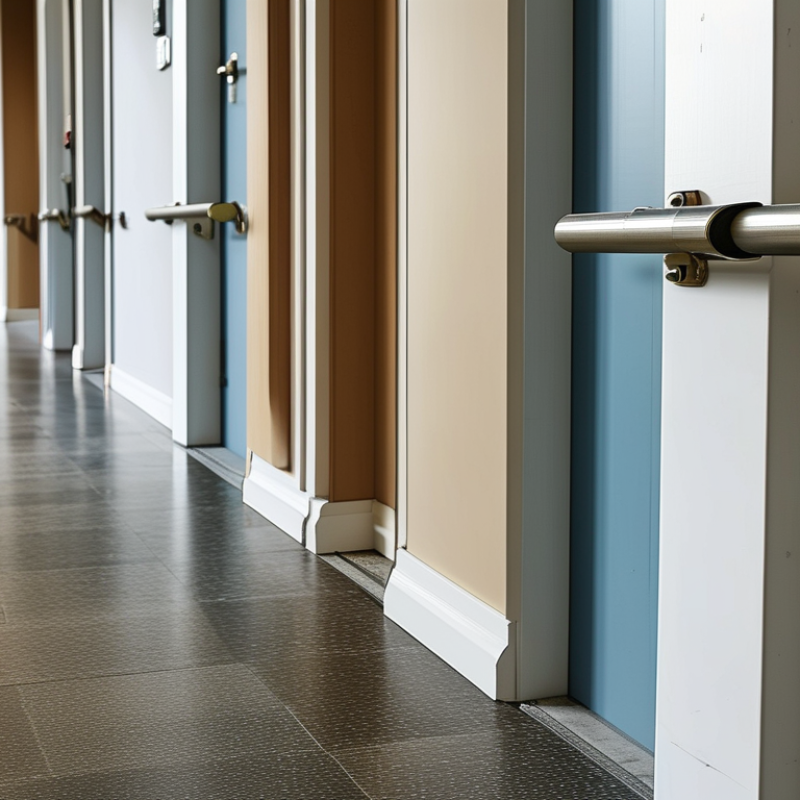
How to Measure Hallways for ADA Compliant Handrails?

Understanding ADA Guidelines for Handrails in Hallways

Understanding ADA guidelines for handrails in hallways is essential. These guidelines ensure accessibility for individuals with disabilities. Hallways must be wide enough to accommodate safe handrail installation. Typically, handrails should be placed 34 to 38 inches above the walking surface. This height provides optimal support for users.

When measuring hallways, consider the width. The ADA recommends a minimum clear width of 36 inches. This space allows individuals using wheelchairs or crutches to navigate comfortably. Pay attention to any obstructions along the walls. Such obstacles can limit access and create hazards.

Tips: Ensure the handrails extend beyond the endpoints. This feature aids those transitioning on and off the stairs or steps. Consider using a textured grip for better handling. It adds a safety layer, especially in wet conditions. Regularly inspect your handrails for wear. They must always be reliable to serve their purpose.

Using solid materials is also important. Light and flimsy structures may not withstand pressure. Reflect on the placement; handrails should be easy to reach. If your measurements are off, the rail may be ineffective. These small details can significantly impact safety and accessibility.

Essential Tools Needed for Measuring Hallways Accurately

When measuring hallways for ADA-compliant handrails, having the right tools is crucial. Use a reliable tape measure for accuracy. A level will help you determine if a surface is even, ensuring that the handrail is installed correctly. A pencil or chalk can mark essential measurement points on walls or floors. A notepad is handy for keeping track of your measurements and notes.

Tips: Always double-check your measurements. Accurate data reduces the risk of mistakes. A second pair of hands can assist, especially in longer hallways where measuring can be tricky. Consider the width of the hallway and any obstructions that might impact handrail placement. When uncertain, consult with a professional.

The importance of proper measurement cannot be overstated. Inadequate measurements can lead to non-compliance with ADA standards. Take your time during each step. Waiting for the right conditions to measure can lead to better outcomes. Ensure your tools are in good condition before starting. Small inaccuracies can create significant problems later.

Step-by-Step Process for Measuring Hallway Width for Handrails

Measuring hallways for ADA compliant handrails is crucial for safety. Start by determining the width of your hallway. A typical hallway should have a minimum width of 36 inches. This ensures that there is enough space for both the handrails and individuals, especially those using mobility devices.

Next, check the height at which the handrails will be installed. ADA guidelines state that handrails should be between 34 and 38 inches above the floor. Use a tape measure to get accurate readings. Sometimes, irregularities in the wall or floor can pose challenges. Make sure to note any obstructions or uneven surfaces.

After measuring, assess whether your hallway meets ADA standards. A width discrepancy can hinder access. It's important to re-evaluate your measurements. Take your time to ensure accuracy. If you're unsure, consult with an accessibility expert. Their guidance can prevent costly mistakes and enhance safety for all users.

Determining Handrail Height and Position According to ADA Standards

When designing handrails for hallways, height and position are crucial factors. According to ADA standards, the optimal height for handrails is between 34 and 38 inches from the ground. This range ensures that individuals of varying heights can easily grasp the rail for support. Additionally, the handrail must extend at least 12 inches beyond the top and bottom of stairs or ramps. This extension provides a secure grip for users as they transition to different levels.

Positioning is equally vital for compliance. Handrails should be mounted on both sides of the hallway whenever possible. They need to be located within 1.5 inches of the wall. This proximity prevents users from losing their grip. The surface of the handrail should be smooth to the touch, enabling easy access for those with limited dexterity. A common oversight is neglecting the need for consistent height along long corridors, which could lead to gaps in safety. Evaluating your design against ADA guidelines helps ensure your installation meets accessibility needs effectively.

Common Mistakes to Avoid When Measuring Hallways for Handrails

When measuring hallways for ADA compliant handrails, many overlook critical details. Accurate measurements are essential to ensure safety and accessibility. According to the United States Access Board, handrails should be installed at a height of 34 to 38 inches. Failing to adhere to these specifications can lead to compliance issues that jeopardize user safety.

One common mistake is neglecting to measure the clearance space around the handrails. The ADA guidelines specify a minimum clearance of 1.5 inches from walls. Many individuals simply gauge the distance from the wall to the rail without accounting for any obstructions. This can create a hazardous environment for users with mobility challenges.

Tips: Always double-check your measurements. Using a laser distance measure can improve accuracy. Also, take into consideration any potential obstructions, like light switches or decorative elements. Ensure that your measuring technique is consistent; inconsistency can lead to unpredictable outcomes.

Another area of concern is the spacing of mounted brackets. These should be positioned every 4 to 6 feet for adequate support. Missing this detail often leads to instability, making a handrail ineffective. Remember to consult the local building codes alongside ADA guidelines.

How to Measure Hallways for ADA Compliant Handrails? - Common Mistakes to Avoid When Measuring Hallways for Handrails

Measurement Area Recommended Width (inches) Common Mistakes
Main Hallway 36 Not accounting for side obstructions
Turns and Corners 48 Neglecting to measure angles
Entry Points 32 Ignoring door swing space
Handrail Height 34-38 Incorrect installation height
Spacing from Wall 1.5 Forgetting to leave space for grasping

FAQS

: What is the optimal height for handrails according to

DA guidelines?

How wide should hallways be for handrail installation?

Hallways must have a minimum clear width of 36 inches for accessibility.

Why is handrail extension important?

Handrails should extend at least 12 inches beyond stair ends for safe transitions.

What clearance is required around handrails?

There should be a minimum clearance of 1.5 inches from the wall to the handrail.

What materials are advisable for handrail construction?

Solid materials are best; light structures may not withstand pressure or use.

How often should handrails be inspected?

Regular inspections are crucial to ensure handrails remain reliable and safe.

What common mistake occurs during hallway measurements?

Many forget to consider obstructions, affecting the distance from walls to handrails.

How should the handrail surface feel?

The surface should be smooth for easy handling, especially for those with limited dexterity.

How frequently should mounted brackets be installed?

Brackets should be spaced every 4 to 6 feet for stability and support.

What can compromise handrail effectiveness?

Inconsistent measurements or overlooking obstruction details can lead to safety issues.

Conclusion

In the article titled "How to Measure Hallways for ADA Compliant Handrails," readers will find a comprehensive overview of the guidelines established by the Americans with Disabilities Act (ADA) to ensure safety and accessibility. Understanding these guidelines is essential for accurately measuring hallways, which involve knowing the correct width, height, and positioning of handrails.

To effectively answer the question, "How to measure a hallway for ADA-compliant handrails?" the article emphasizes the importance of using essential tools, alongside a step-by-step process for measuring hallway dimensions. Additionally, it highlights common pitfalls to avoid during measurement to ensure compliance with ADA standards, ultimately guiding readers towards creating safe and accessible environments.

Oliver

Oliver

Oliver is a seasoned marketing professional with a wealth of expertise in driving brand awareness and engagement. With a deep understanding of our company's product offerings, he consistently delivers high-quality content that enriches our professional blog. His insights not only shed light on......